


60. Doll clothes pattern club edition
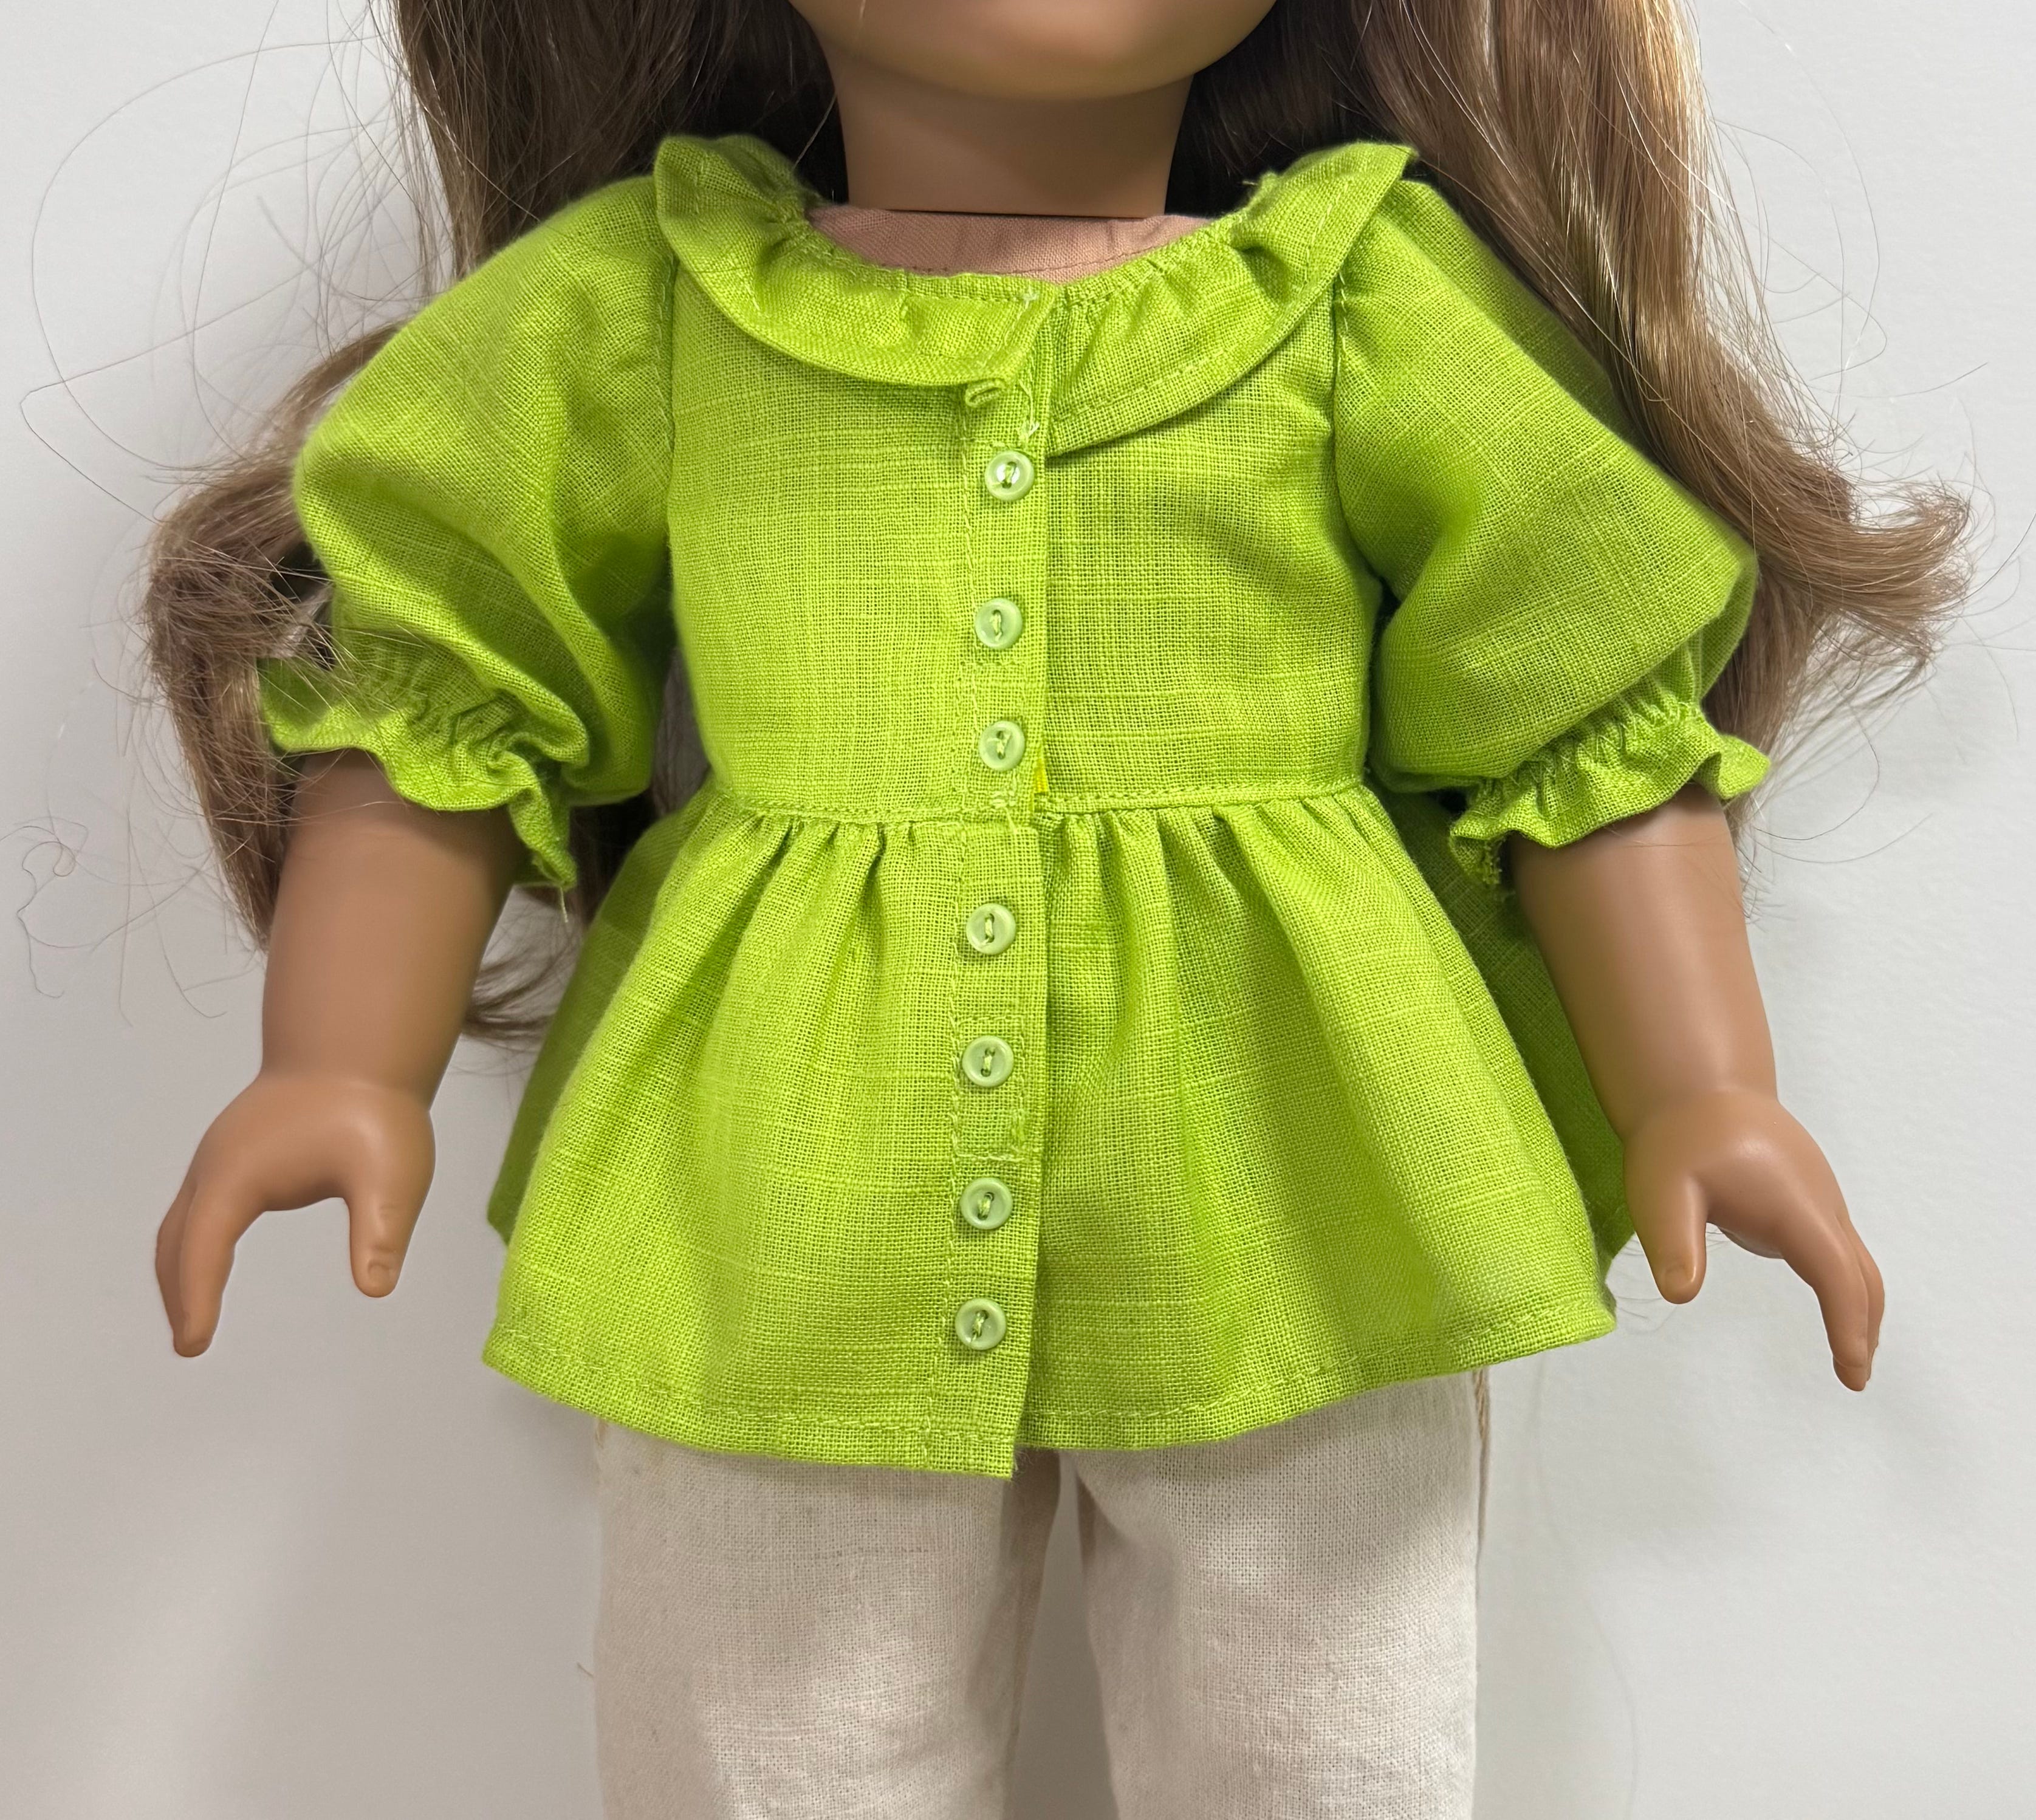
This month I am offering a design that can be a tunic or a dress.


I love designing doll clothes. Along with that I also love making them. There is something so satisfying about getting the design and the fabric just right then putting it all together in a way that makes it accessible for all levels of doll dressmakers.
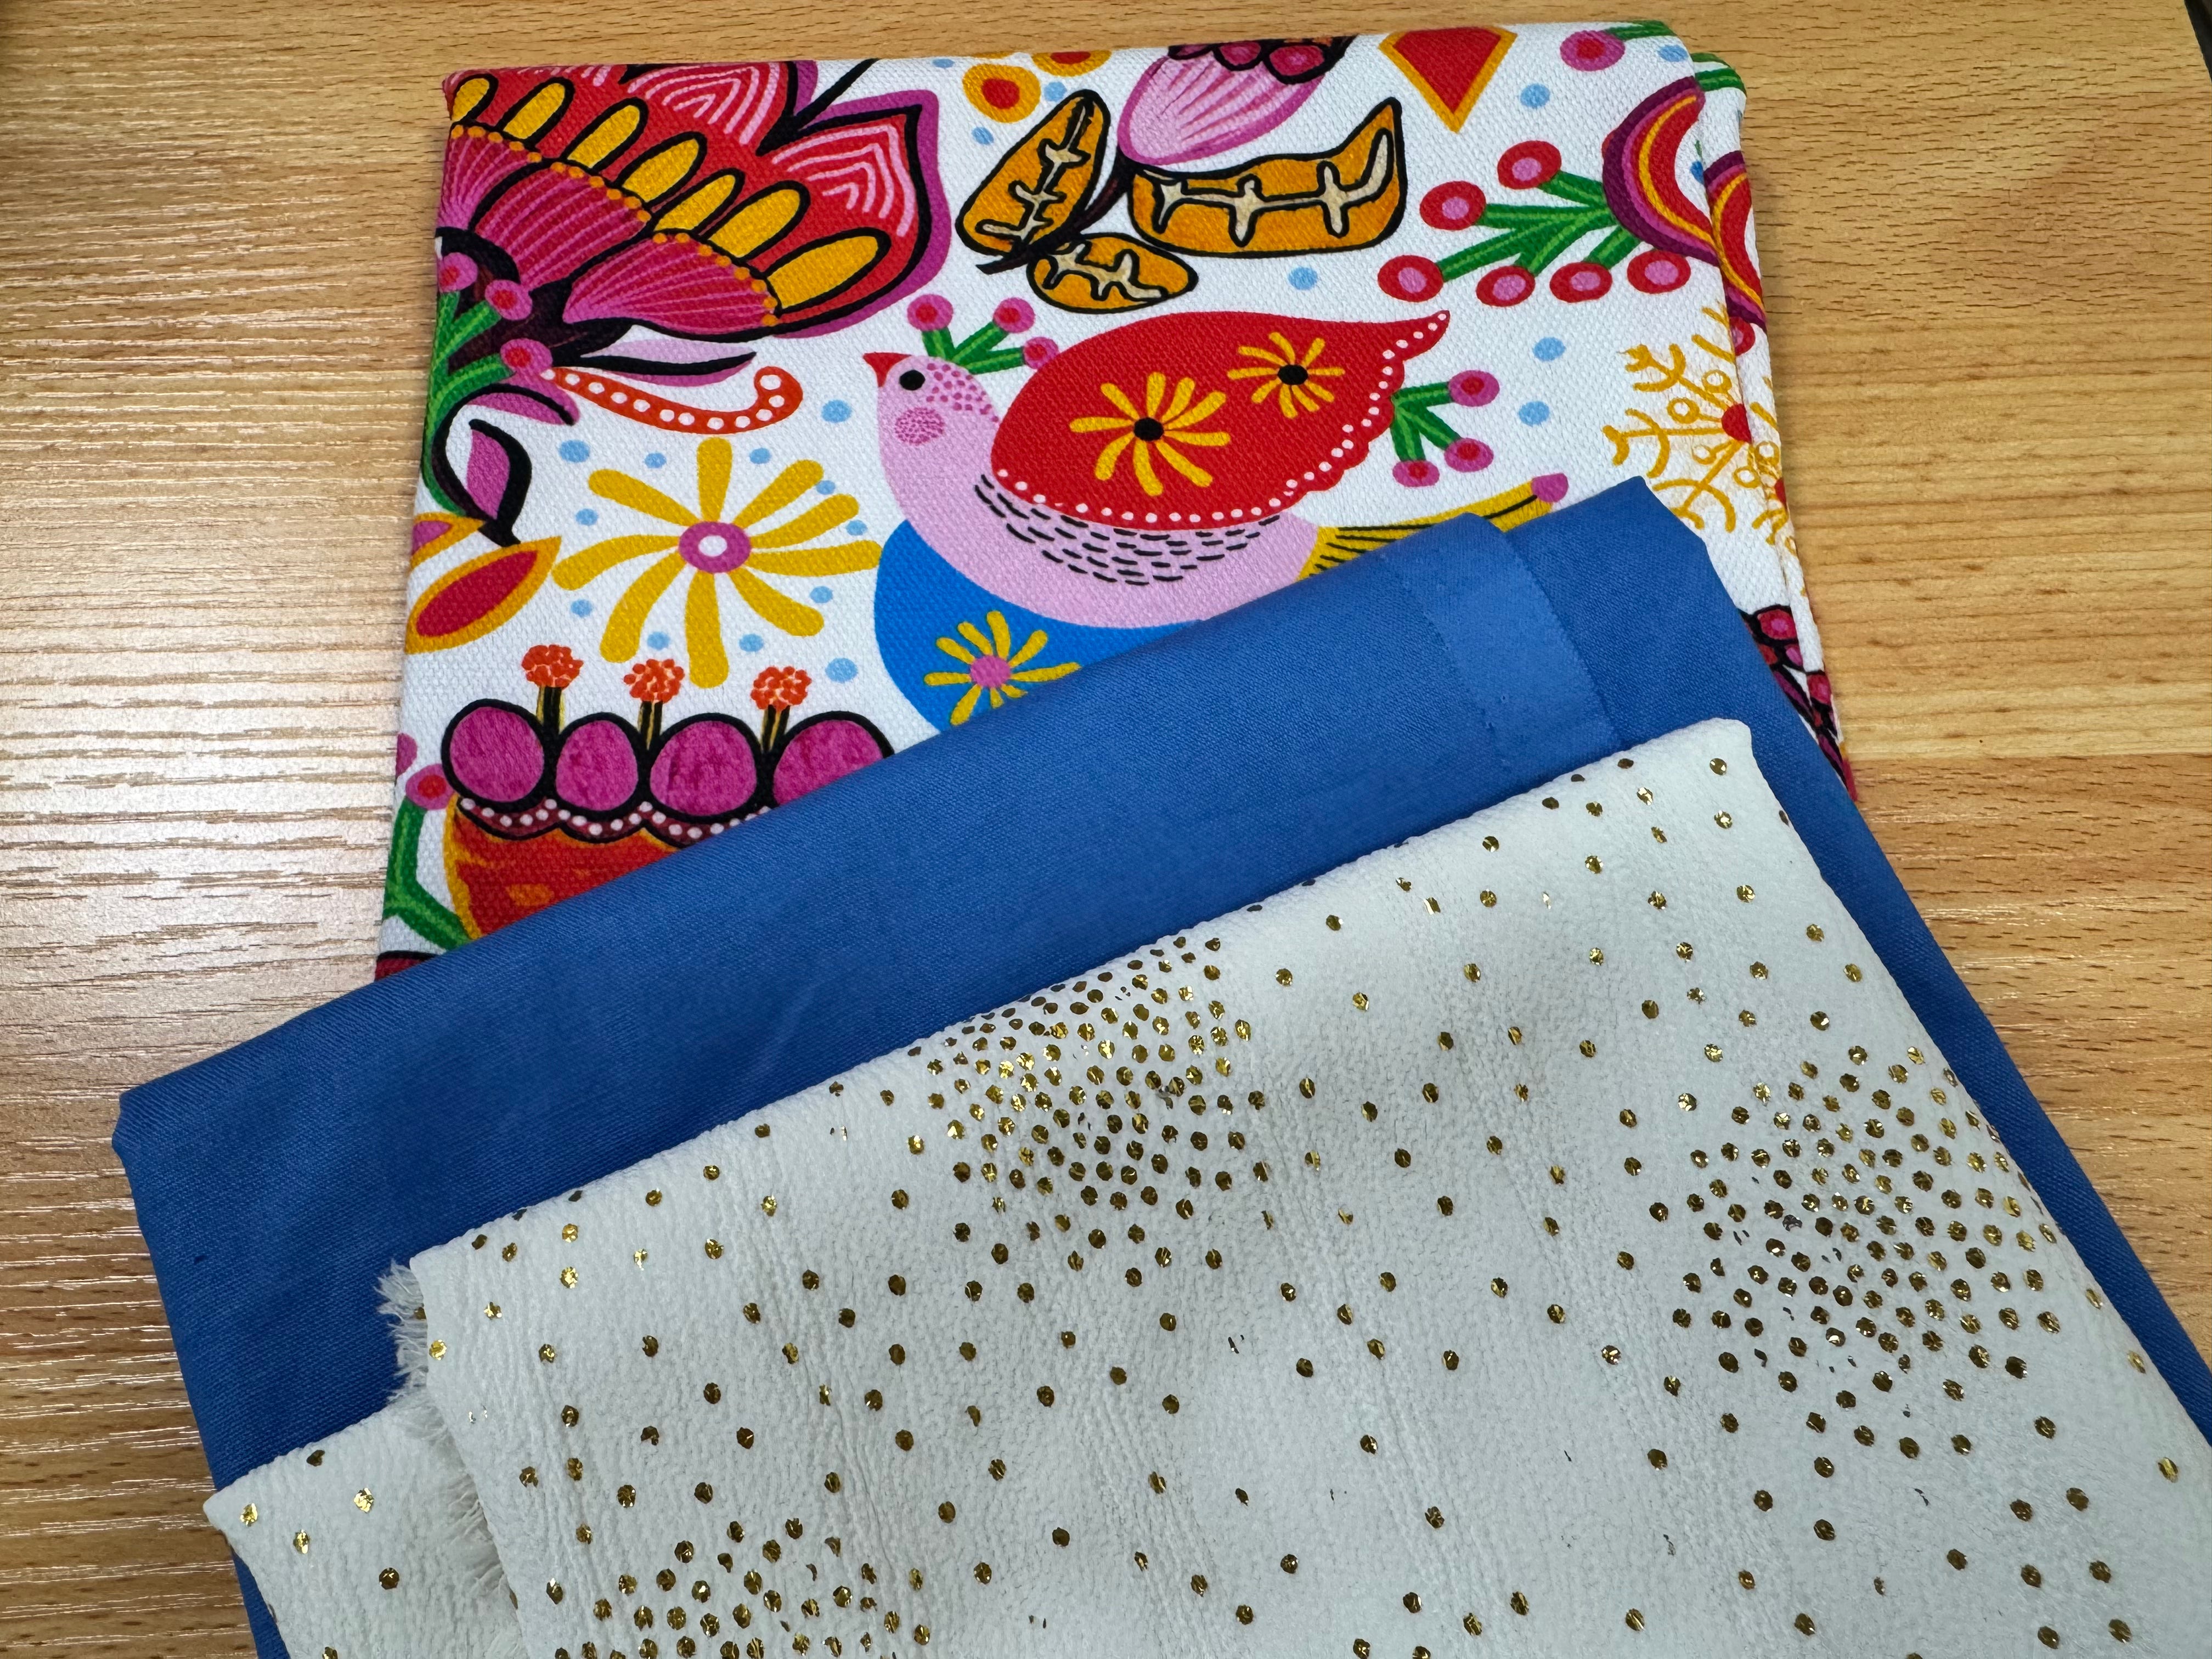
It’s such fun to buy fabric and dream about what to make. I usually go into the fabric shop with something in mind but it is hard to resist all the beautiful fabrics. The colourful print is from the furniture fabric department and I plan to make a stylish coat with a flared peplum. The airy fabric with the gold spots is to make a top with a V neck, a shaped tunic skirt that points up towards the V neck in front and the 3/4 sleeves that also feature in this month’s design.
There is also something very inspiring about a clean uncut half metre of fabric that makes all my remnants very unsatisfying. One day I will get to the point where I can get rid of cut pieces without thinking about what little thing I could use it for but I’m not quite there yet.
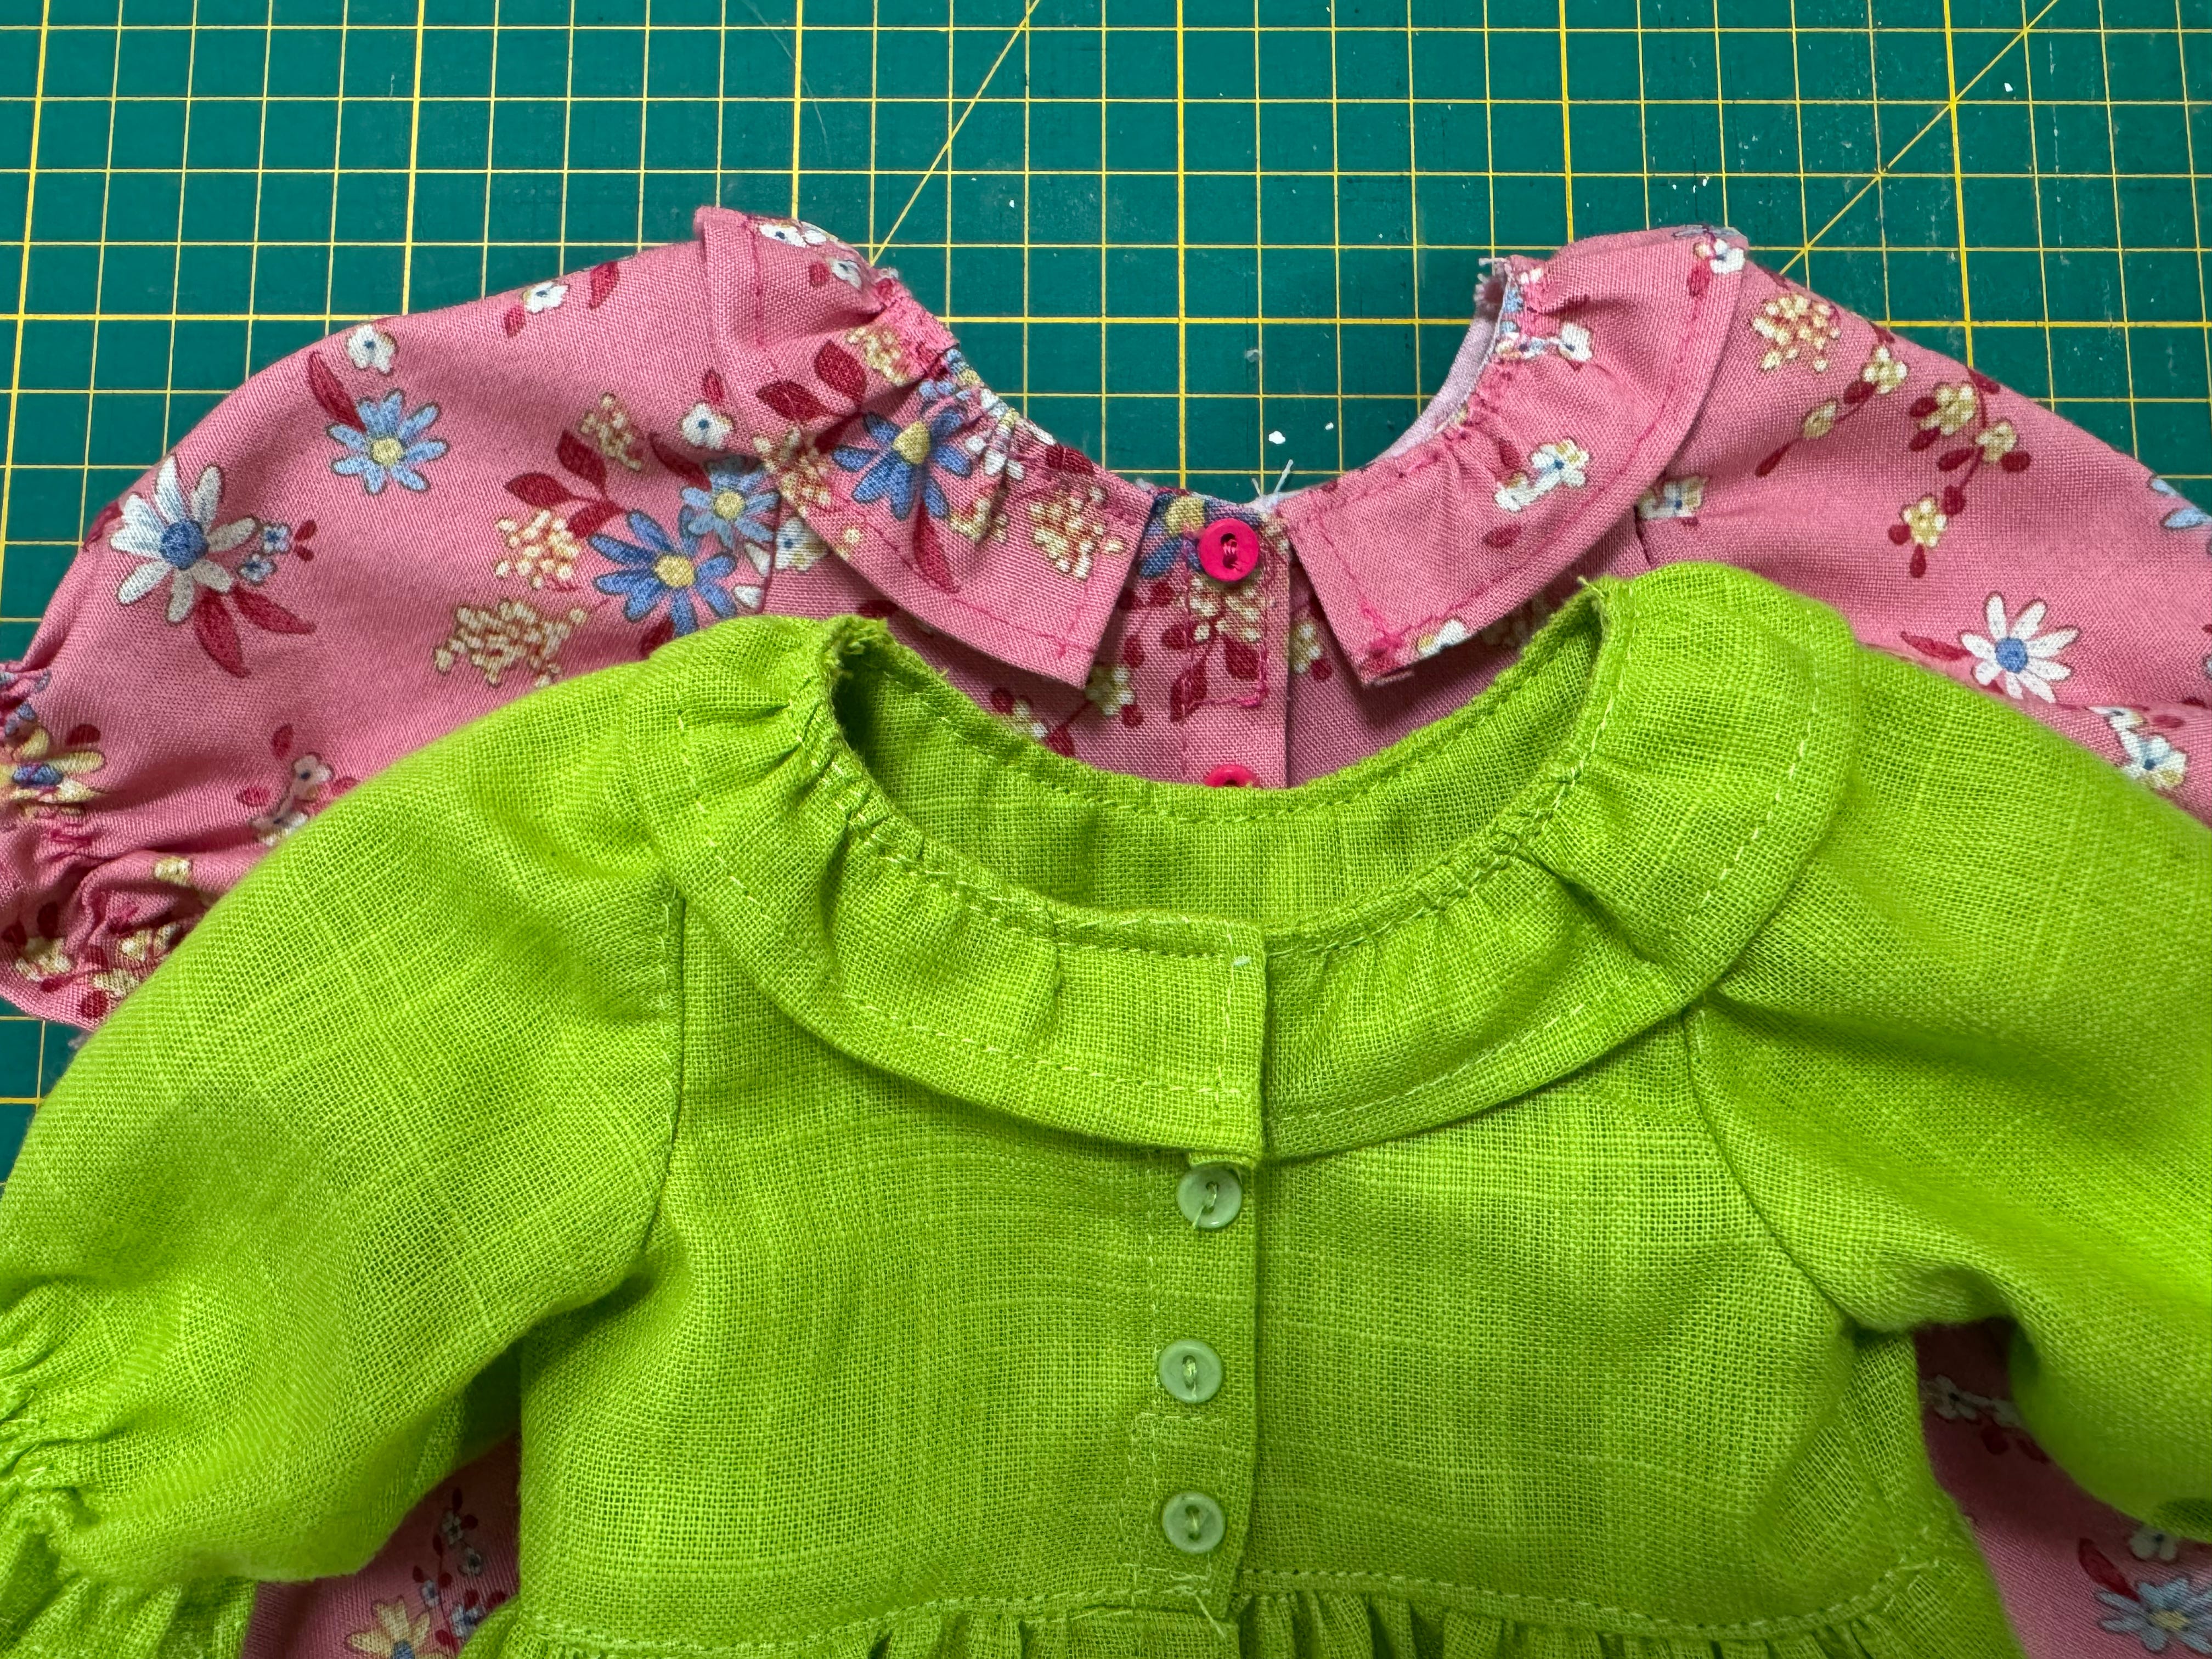
This month I worked with parts of a previous design and came up with the tunic and the dress. I had the idea for the sleeve and thought it would work well with the ruffle neck band on the original blouse and I just created a skirt instead of a short ruffle at the waist. Sorry I can’t show the face due to American Girl copyright.


The tunic has a shorter skirt. It was also the first one I made and I realised I needed to adjust the neck ruffle and front facing so there was a gap in the ruffle at the centre front. I thought the green neck looked a bit odd and I like the change I made when I made the dress.
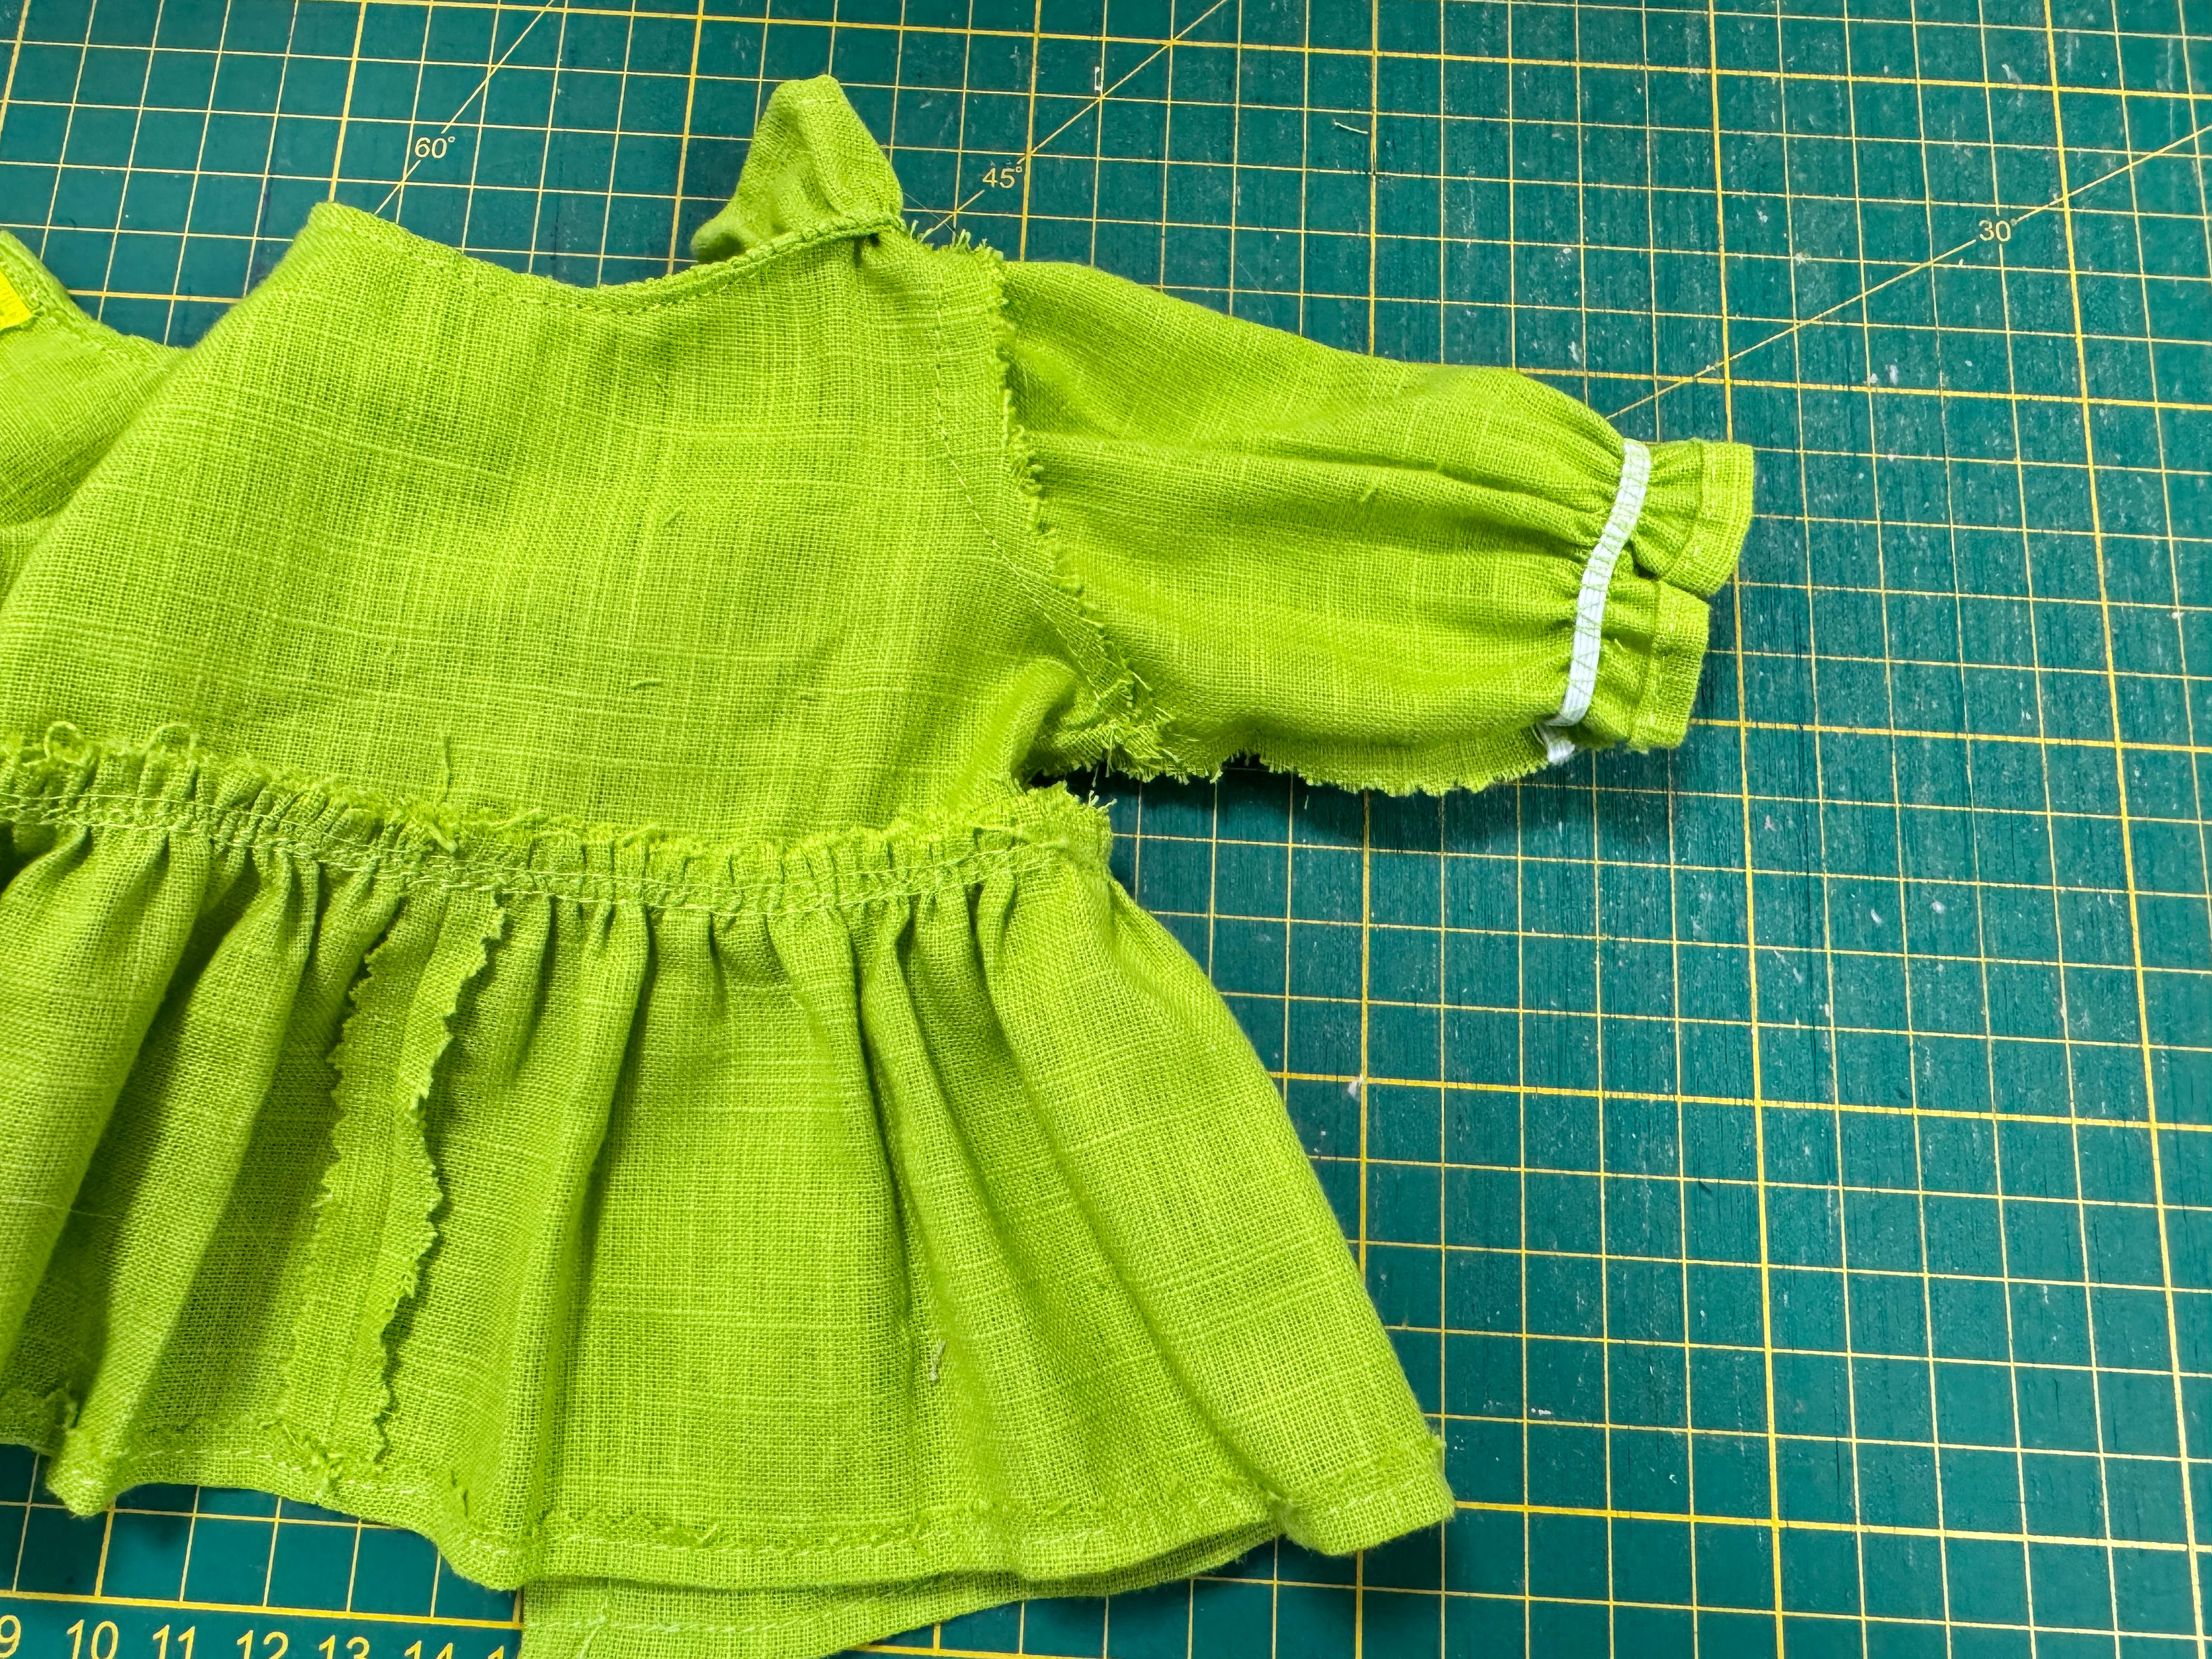
The elastic for the sleeve is 1/8” and I zig zagged over it. I have a photo tutorial on my old doll clothes blog here and I include the link in the pattern file.
I do all my exposed edges with the pinking shears when I cut out the pieces. It saves time and thread for overlocking and also is less bulky than overlocking.

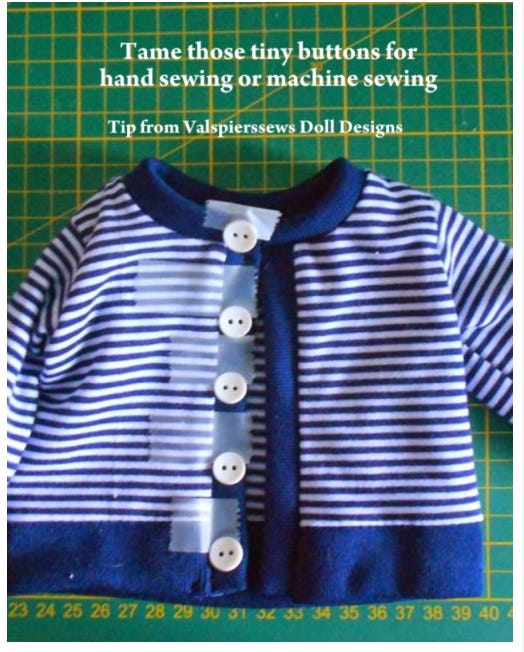
I use velcro patches instead of long strips. I just find it easier to do up and the patches hold very well. Once I have the hooks under the doll’s right side and the loops on top of the doll’s left side I add the buttons.
I lay the dress as flat as possible and space out the buttons by eye. I then get a strip of sticky tape and place it over the buttons and press it onto the dress to hold the buttons in place while I zig zag the buttons on with my machine. I have gone from a piece of tape for each button to one long strip. This tip from my blog is from 2014.
I am always taking note of the pricing of doll clothes patterns and 6USD is on the low side to match the prices in my Etsy shop. However, any patterns that I make for substack and decide to add to Etsy will be at least 6USD. As the archive of patterns and resources grows I will be increasing the price just a bit and probably only once or twice over the lifetime of the newsletter. It’s also pretty much on par for the printables and digital resources that I offer each week. If you are subscribed before the price rise at the end of February you will continue at your present price as long as you stay subscribed. At present there are about 10 patterns in the archive and I still want to make up for my slow start in the first months of the pattern club newsletters. I have ideas for creating new looks from designs I already have so I am keen to add a few extra patterns over the rest of this year.
This latest design is available for paid subscribers to download this month.

Cheers,
Val